Cannabis plants diseases: how to detect and treat them
The two worst nightmares of any grower are diseases and pests. That’s why its so important to know how to detect these problems in time and be able to eliminate them; otherwise, they can ruin entire harvests.
In this article we explain which are the most common and how you can keep your crop healthy.
Cannabis plants are exposed to multiple threats throughout their life cycle, whether they are grown indoors or outdoors. Certain growing conditions, or grower’s mistakes (such as an unbalanced pH in irrigation), can favour the entry of fungi, pests, bacteria and viruses.
In any case, the best weapon of a good cannabis grower is prevention, and this means the early detection of any symptom that indicates that a disease or pest has crept into the crop. Below we explain what are the most common dangers in the cultivation of cannabis, how to identify them, and how to eliminate them.
What are the most common diseases and pests of cannabis?
There are many diseases and pests that can endanger your harvest, but experience tells us that there are some that occur much more frequently in cannabis crops.
So, if you want to fill your pantry with rich buds, you should pay attention so that the following pests and diseases do not appear in your little garden of Eden.
Powdery Mildew: the white nightmare
Powdery mildew is one of the most common fungal diseases in cannabis crops and, although it is not one of the most lethal, it can kill your crop if you do not detect it in time.
This pathogen needs certain conditions to appear and develop, in particular it likes warm temperatures (above 20 degrees) and humid environments.
It also has a tendency to crop up when there are drastic differences between day and night temperatures, since this can cause humidity levels to spike. It is because of this last factor that it often appears during the flowering stage, which is very dangerous because if it reaches the flowers these will be totally unusable for consumption, as it would be a danger to our health. You should never consume buds infected with any type of fungus.
How to identify powdery mildew on cannabis plants?
Fortunately, powdery mildew is easy to identify, as it appears as a white powder on the upper part of the leaves. If the infection is in the early stages, the white powdery spots are similar to water stains; as the fungus develops and progresses, it begins to cover larger extensions of the leaf and later reaches the stems and flowers of the plant.
By the time the fungus is identifiable by sight, you should assume that the entire plant has been infected and likely any around it. Infection can not be detected by sight, but instead it is the proliferation and blooming of the fungus in the perfect conditions that get seen. For this reason, by the time you see it, its often too late.
How to get rid of powdery mildew
The first step is to remove any and all affected foliage, including any flowers or buds that might be contaminated. If your plants are in vegetative stage, they can be treated with soap and water, and a variety of compound solutions or pesticides available at your local grow shop. Be careful; a lot of these compounds, like myclobutynil is incredibly dangerous for use on cannabis crops despite being regularly sold for use on them. It’s illegal in many legal cannabis regions for use on commercial crops.
Best way to get rid of powdery mildew is to not get it at all, and this means a good handle on environmental control. Good ventilation and humidity control are vital.
If you do have powdery mildew, the best defence is often to cut the plants, and start fresh. This is a very persistent infection, and many if not all of the options for removing it from cannabis plants will also result in a crop that is dangerous to smoke.
Botrytis or grey mold
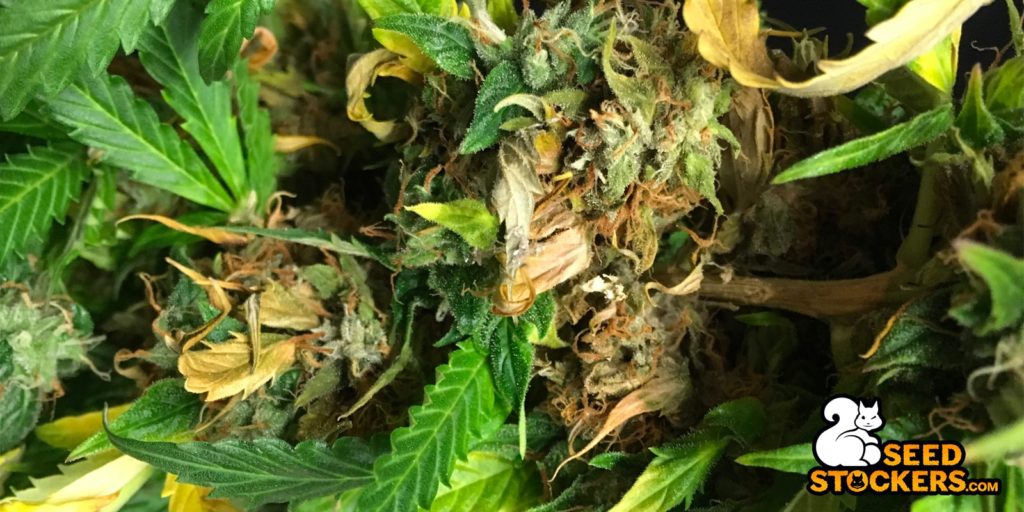
Botrytis is one of the most common fungi in the cultivation of cannabis and is very easy to detect, as it appears as a necrosis that can affect stems, leaves or buds. You will recognize it because the affected parts turn brown or gray, with a deathly appearance and even begin to disintegrate in when touched.
It is important to act quickly when Botrytis makes its appearance in crops, because if this fungus is allowed to advance, it can end up destroying the entire crop.
How to prevent Botrytis
This fungus appears in growing environments with high humidity levels and poor ventilation. Therefore, it is a fungus that usually attacks during the last stages of the flowering period.
- Botrytis in indoor crops: it usually appears in poorly ventilated spaces with high humidity. Some genetics are more susceptible to Botrytis because they develop very dense buds where this fungus finds “the ideal habitat”. It is therefore important to control humidity levels and to ensure that “pockets of humidity” are not created in some parts of the grow room or grow tent, i.e. that all plants are adequately ventilated.
- Botrytis in outdoor crops: outdoors, the main promoter of this fungus is the weather. It usually appears towards the end of flowering with the arrival of rains and bad autumn weather. If you live in a cold region with short summers, the best weapon you have to prevent Botrytis from threatening your crop is to choose short flowering Fast genetics (which are harvested before the arrival of bad weather), or to grow autoflowering plants that will be ready in a few months
How do you get rid of Botrytis?
If you detect that botrytis has settled on your plants, immediately cut the infected parts. Do it with sterilized scissors and 3 cm below the gray “spot” of Botrytis, or the infection. This is to ensure that no trace remains. When you have finished pruning the affected parts, get rid of these remains and re-sterilize the material you have used to do so.
Root Rot
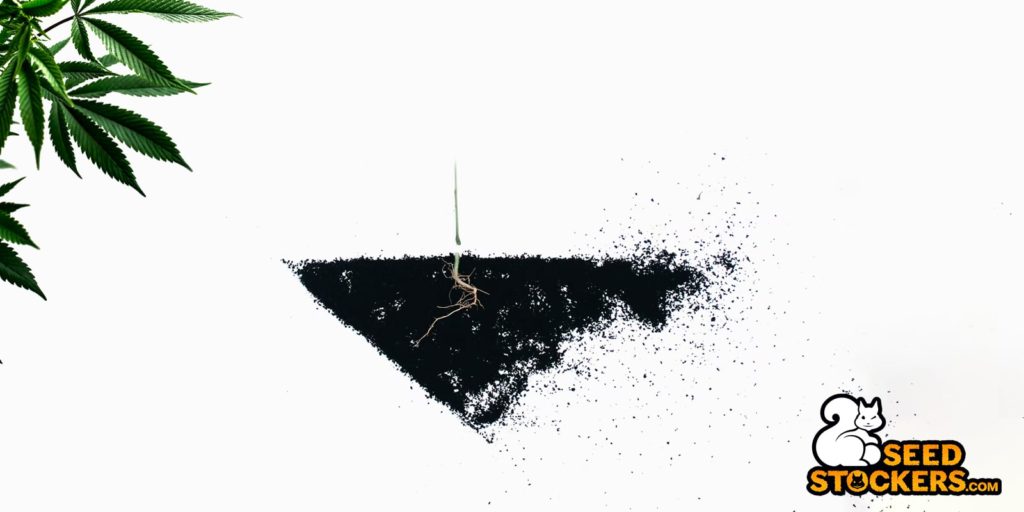
Root rot is a disease that affects the cannabis plant and can be caused by various pathogens. Normally, root rot is caused by fungi (although it can also be caused by bacteria), which settle in the soil and damage the roots of the plants.
If you are unlucky enough for them to settle in your crop when your plants are in their first stage of life, the chances of them surviving are practically nil. In general, root rot shows its face when there is poor drainage and high humidity around the root zone.
How to identify Root Rot
Here are the symptoms to watch out for, as we have just mentioned, depending on the stage of life your plants are in, root rot will affect them in a more or less virulent way.
- Roots turn brown (instead of their usual white).
- Development stops completely or slows down, the plant has difficulty absorbing nutrients.
- Leaves turn yellowish or even brown around the edges, dry up and fall off.
- The plant dies.
How do I get rid of root rot?
Unfortunately, there is no method that guarantees its elimination, once this disease has settled, it is difficult to fight. Therefore, the fight against root rot is waged in prevention methods:
- Always use quality, sterilized substrates.
- Make sure that the plant is in an aerated environment, a good oxygenation of the roots of cannabis is essential to prevent this type of disease and for the health of the plant in general.
- Avoid excessive watering in which the substrate of the plant is waterlogged for several days, this is usually the origin of this disease.
- Make sure that your growing space is well ventilated and that there are no “pockets of humidity” at certain points.
If root rot still appears, in the case of cannabis cultivation, it is usually more convenient to get rid of the plant than to try to treat it.
Spider mites
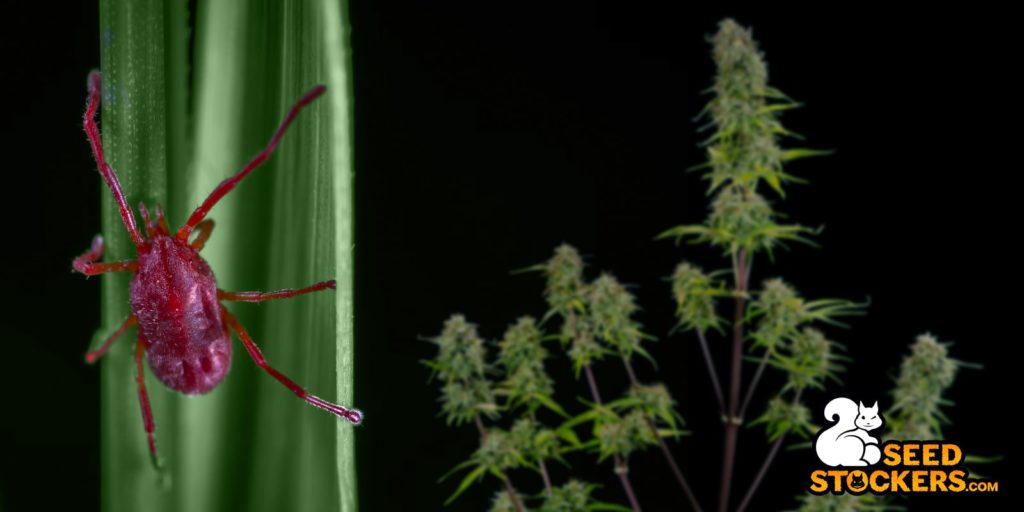
The spider mite is a microscopic insect, almost imperceptible to the human eye, that feeds on the sap of the plants. If this pest develops a lot, you may reach a point where you have to write off your harvest as lost, so it is important that you are well aware of the symptoms on your cannabis plants and identify it in time:
- Small white spots on the leaves, these are the marks left by this spider when feeding.
- Sometimes black specks may appear on both sides of the leaf.
- If you want to be sure that it is a spider mite, we recommend that you use a magnifying glass or microscope to analyse the leaf, with them you will be able to see the insect (especially on the underside of the leaf).
How to prevent and eliminate spider mites in cannabis crops?
The first thing you should do is to ensure that spider mites do not settle in your crop, so it is important that you take the following measures:
- Maintain an adequate temperature in your crop (if it is an indoor crop), not exceeding 25 degrees.
- Spider mite likes dry environments, therefore, especially during the vegetative phase, try to keep the relative humidity of your crop between 50% and 60%.
- The best prevention method for spider mites is a clean cultivation and a clean house, when growing indoors.
If none of this has worked and the spider mite has settled in your crop, you can clean the leaves where it is found with a mixture of water and alcohol (yes, it is a heavy task but it is worth it), or use products to eliminate it such as neem oil or potassium soap.
Spider mites are a very persistent nuisance, and often times an indoor crop must be destroyed entirely and the grow space properly cleaned out with strong cleaning products before restarting some weeks later.
Damping off or nursery sickness
Damping off is a disease affecting cannabis plants that can be caused by various fungi such as Pythium or Fusarium. The damage caused by various pathogens is included under this umbrella because it affects especially seedlings.
Damping off appears when there is an excess of humidity and the substrate or medium is not sterilized. This disease is quickly recognized because it acts in a sudden and forceful way, you will recognize it because the part of the stem of your cutting or seedling (usually the area that is closer to the substrate), “thins”, the stem bends and the seedling dies.
How is Damping off prevented?
There is little that can be done when Damping off attacks your seedlings other than to separate the healthy ones so that the same thing does not happen to them. However, a good work of prevention will prevent this disease from entering your growing space, therefore, hygiene and sterilization of both utensils and the medium in which you are going to place your cuttings or seeds, is essential.
Septoria: the spot disease
Septoria is a disease commonly caused by a fungus that develops very quickly and, although it is more typical of other vegetables such as wheat, it also frequently attacks cannabis plants.
You will recognize that septoria has entered your crop because:
- Yellowish spots appear on the leaves that darken until the leaf dies.
- The growth and development of the plant slows down and in extreme cases the plant dies.
How to treat septoria in cannabis cultivation?
If your cannabis plants have been infected with this fungus, the first thing to do is to separate the affected plants from the healthy ones so that the disease does not spread. From there you can treat the plants that have contracted septoria by spraying them with horsetail.
If the disease is at a very advanced stage, you can resort to specific chemical treatments for this fungus; however, read the manufacturer’s instructions carefully before using this type of products and always respect the safety procedures.

Some tips to prevent diseases in your cannabis crop
Every expert grower knows that the key to saving headaches is to apply good prevention methods.
Remember these tips and incorporate them into your growing routine.
- Cleanliness and hygiene: a fundamental factor to avoid any kind of issues in your garden. Pick up dry leaves, sterilize your tools and try to use clothes and shoes exclusively for your crop (don’t bring pests to your space in your street clothes).
- Humidity and temperature: keep these parameters within the advisable in each phase of cultivation, incorrect values promote the appearance of fungi and pests.
- Watering: use the quantities and frequency appropriate to the needs of your plants, a waterlogged substrate is the gateway for fungi.
- Act quickly: if you observe any sign of disease in any of your plants, separate them from the healthy ones as soon as possible.